The International North-Eastern Petra Project

Preliminary Report on the 2012 Season

by Stephan G. Schmid, Zbigniew T. Fiema and Bernhard Kolb

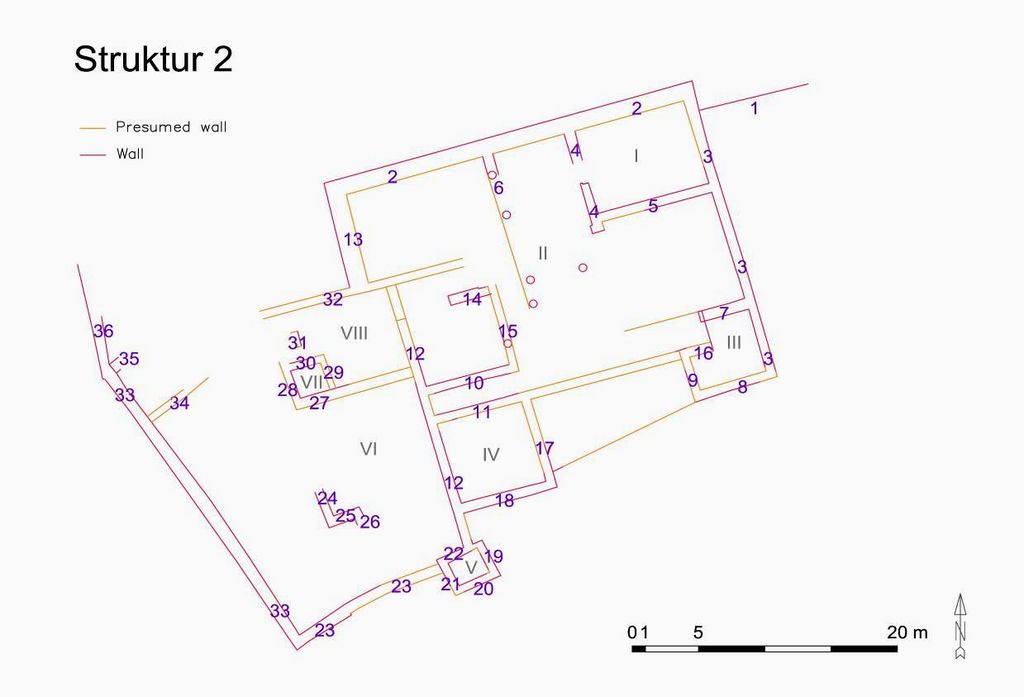
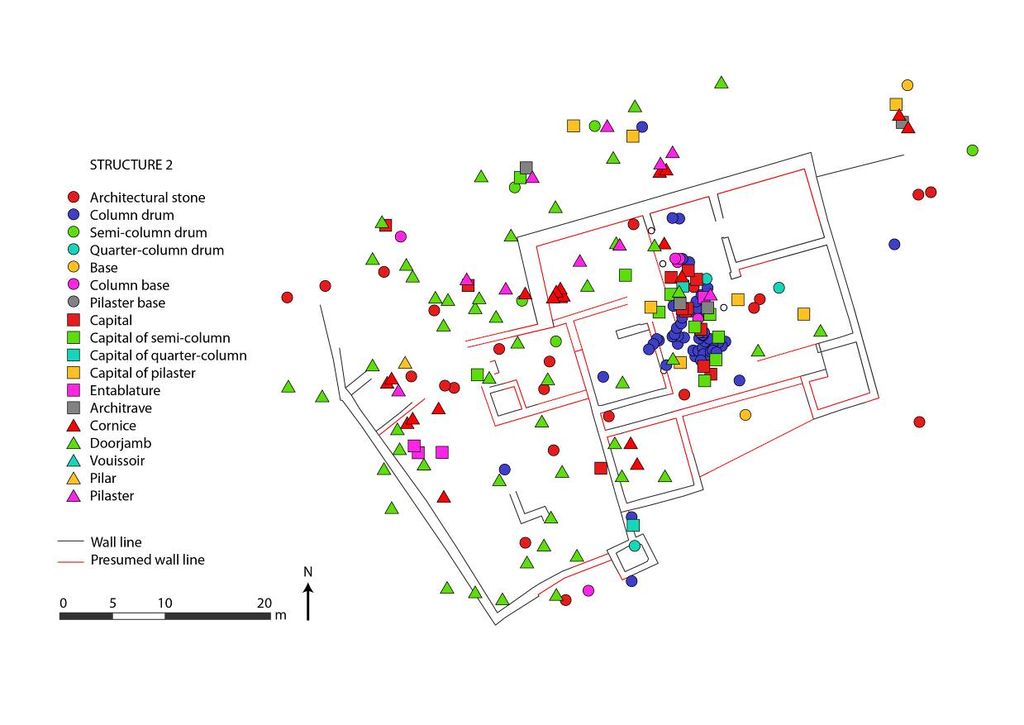
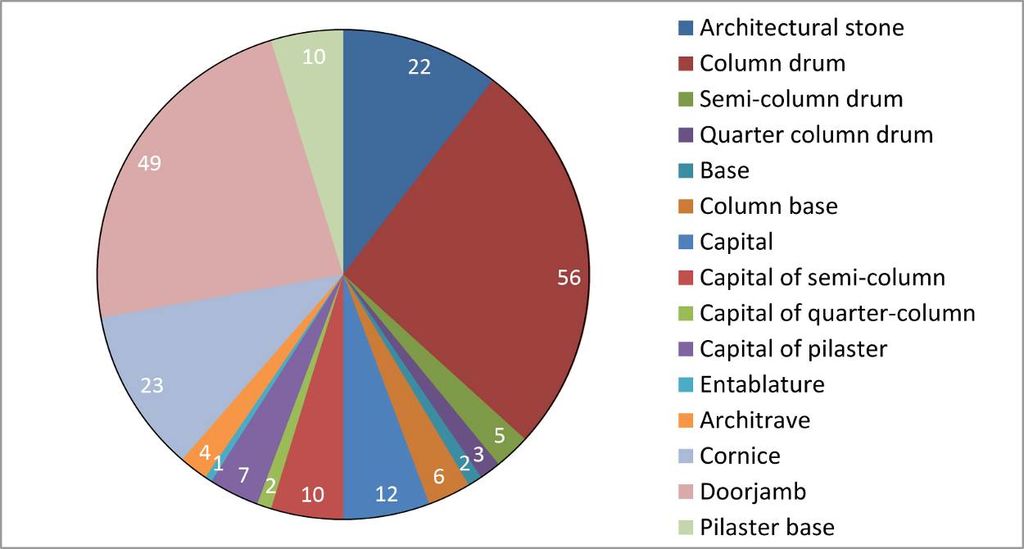
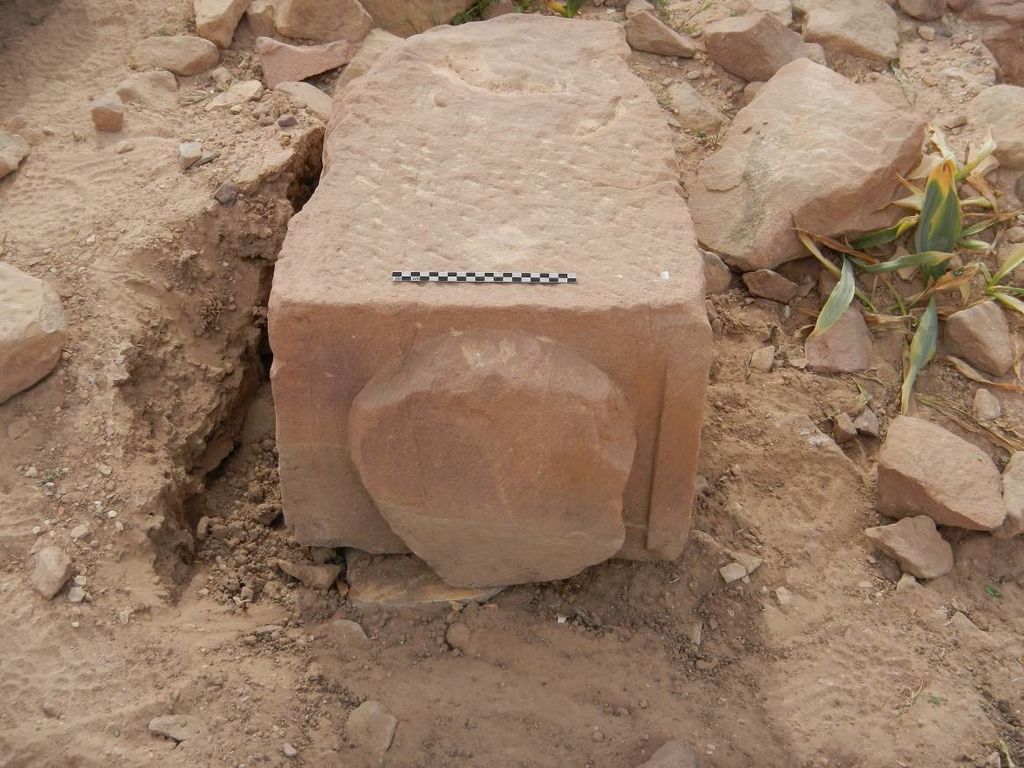
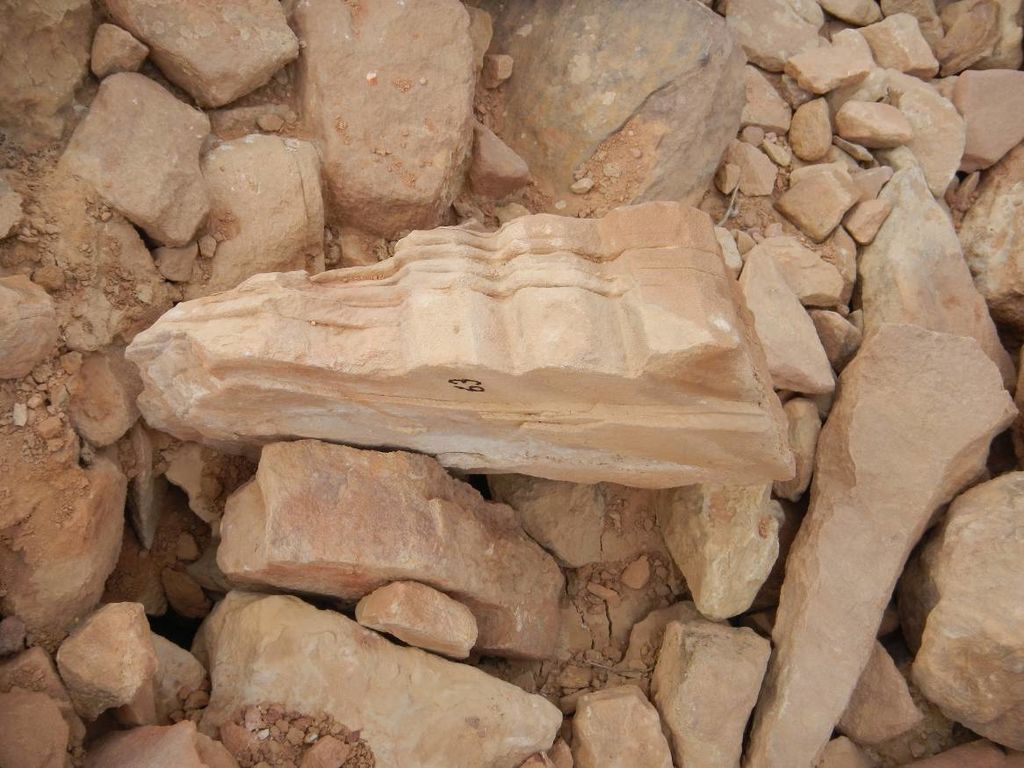
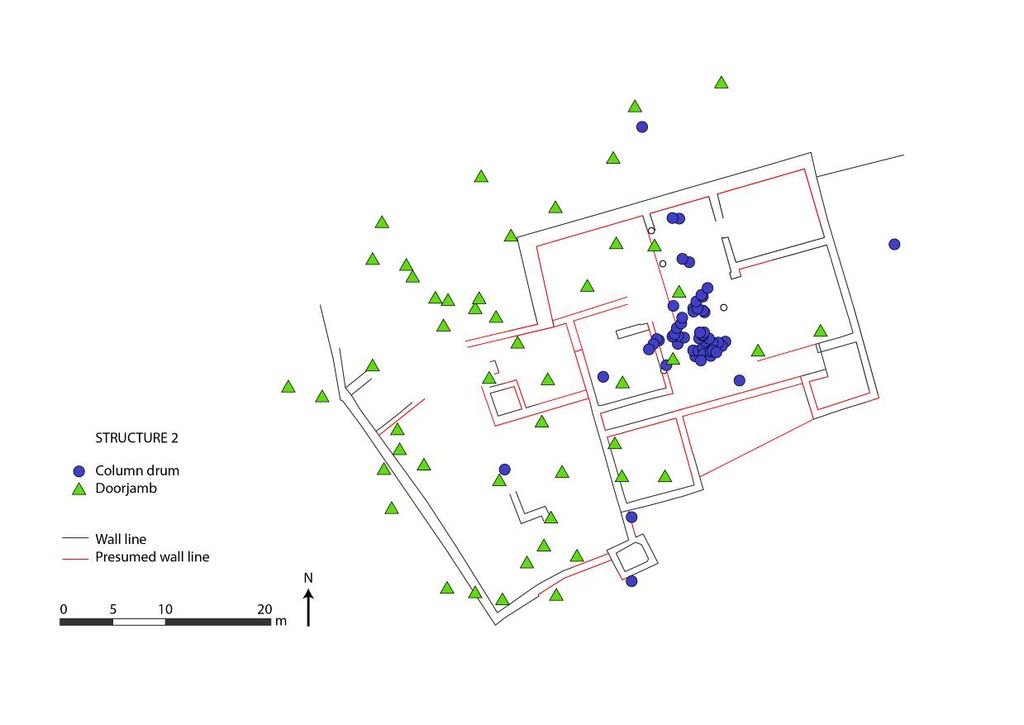
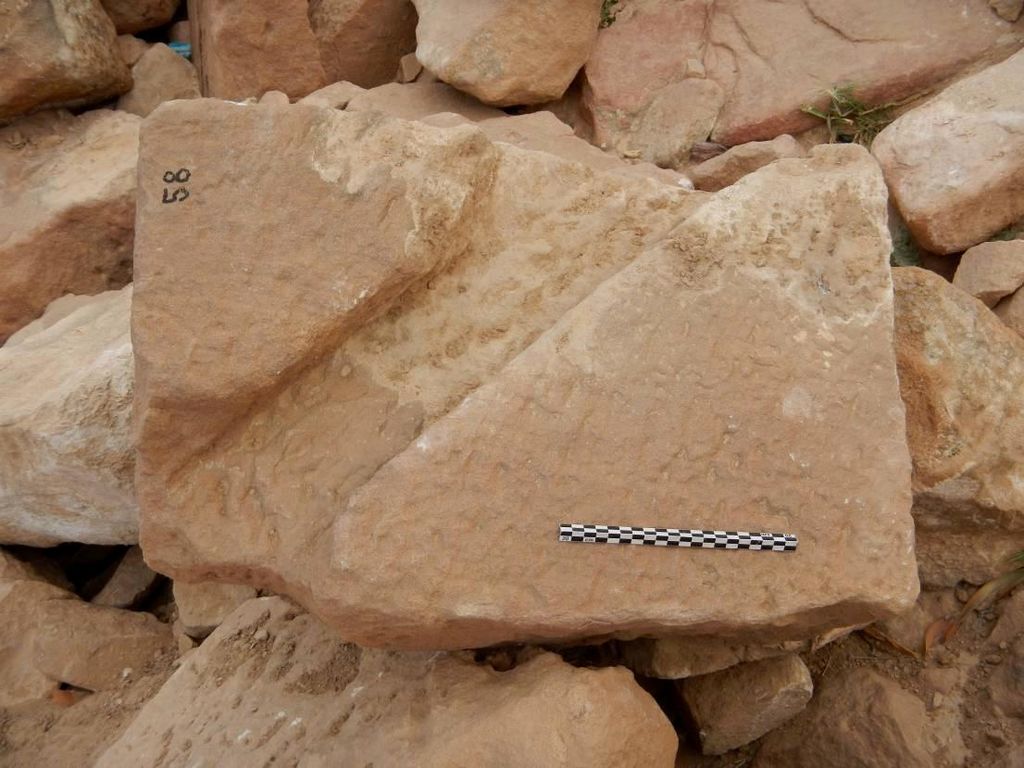
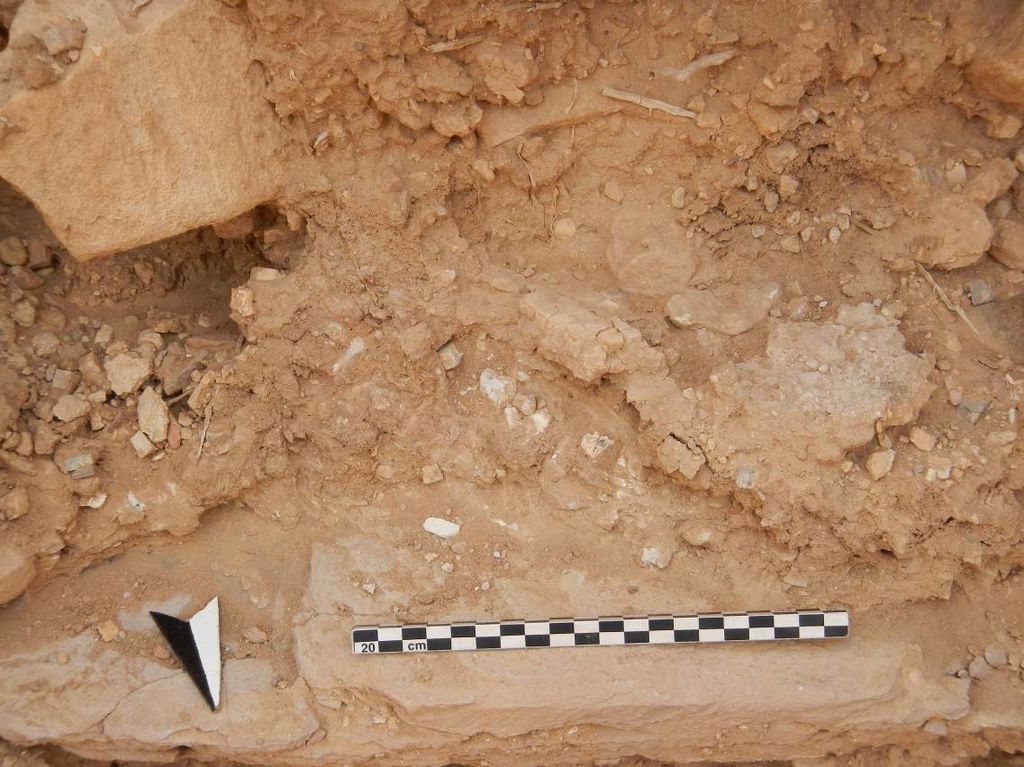
III. 2012 survey season – structure 2

This very large building (48 x 34 m) is located in the north-central part of the survey area (see fig. 3) and consists of at least eight rooms, including staircases (fig. 9). Altogether 214 architectural blocks have been found inside or directly outside the building (figs. 10. 11). In addition to the multitude of column drums and door jambs (cf. fig. 14), impressive array of decorative elements (e. g., triglyph and metope blocks and other decorative elements of entablature) were found (figs. 12. 13).

Fig. 9: Overall plan of Structure 2 (plan: J. Falkenberg and M. Holappa)

As opposed to Structure 1, there is much less evidence for substantial changes, restorations or redefinition of space in Structure 2 although it is much more difficult to follow wall lines and so the division into discrete parts is much less certain. If the same disaster as that postulated for Structure 1 has also affected Structure 2, either the impact was much less devastating or the building was restored with minimum of structural and decorative changes. At any rate, the current location of architectural elements seems to be much closer to their original location, e. g., the southern part of Room II. Characteristic for Structure 2 is the consistent, unmixed and severe use of architectural decoration here. Decorative elements (Nabataean capitals, Corinthian bases, elements of entablature) seem to follow the same homogeneous concept of architectural decoration, datable to the 1st century AD, and with the parallels easily found in the Qasr el-Bint temple and the villa at ez-Zantur IV.

Fig. 10: Distribution map of Structure 2 with all recorded architectural elements (plan: M. Holappa)
Fig. 11: Chart of all recorded architectural elements related to Structure 2 (chart: M. Holappa)

The long main façade of the building (Wall 2), between Walls 3 and 36, is located on the northern side. Also there must have been located two main entrances to the building. One was a monumental, all-stone stairway between Room II and Room VI (directly west of Wall 13). The other one, further west (east of Wall 36) was probably equally impressive but judging from a number of specifically cut blocks found there (fig. 15), that staircase must have featured steps made of wooden planks.

Fig. 12: Metope from Structure 2 (photo: S. G. Schmid)
Fig. 13: Fragment of a triglyph from Structure 2 (photo: S. G. Schmid)

Most of the space in Structure 2 is occupied by Room II, a large rectangle which probably was not symmetrical in internal arrangement. Directly to the east, there is Room I, possibly originally an enclosed area (triclinium? courtyard?) rather than a room, with the mosaic floor featuring small black and white tesserae, which – together with the pottery collected at that spot – would date the floor to the 1st century AD (figs. 16. 17). The main feature of Room II is a colonnade running N–S and west of Room I. It is possible that it could have turned eastward to run along Wall 11 and thus having L-shaped plan. The colonnade features uniform columns (diameter of 62 cm) crowned exclusively by Nabataean, blocked-out capitals, that were all found in great density in this area (figs. 10. 14. 18). No Corinthian capitals were found.

Fig. 14: Distribution map of column drums and doorjambs related to Structure 2 (plan: M. Holappa)

The high incidence of half-columns indicates that these were also used in the decoration of Room II. The western half Room II, west of the colonnade, is more difficult to interpret. It is possible that this space might have later been subdivided (by e. g., Walls 10, 14 and 15). The density of architectural element finds is markedly lower here than in the eastern part of Room II (cf. fig. 10). In the SE corner of the structure there is small Room III, directly connected with Room II. Room III might have served as a food preparation or service area.

Fig. 15: Architectural block from Structure 2 belonging to a staircase (photo: S. G. Schmid)

Directly west of Room II there is a monumental stairway to the north, mentioned above, and Room VIII. This room appears to contain a staircase arranged around the central stone core. The staircase might have served to provide access from the lower level of Room VI into higher level possibly associated with Room II. A small, quadrangular Room VII, in the SW corner of Room VIII, might somehow be associated with this staircase. To the SW of Room II, there is Room IV the function of which cannot be determined.

Fig. 16: Structure 2, remains of mosaic floor in situ (photo: S. G. Schmid)
Fig. 17: Structure 2, tesserae of white, gray/black and red (from left) colour (photo: S. G. Schmid)

Room VI which stretches along the entire western width of Structure 2, features a somewhat different main axis in its central and southern parts, although in the north, where the second main stairway is located, the axis follows the N–S axis of the entire building. Room VI appears to be a large open courtyard, seemingly without a colonnade and the second floor. But, judging from the presence of several blocks decorated with triglyph and metope indicates that the exterior of Wall 33 featured a highly decorated façade (figs. 12. 13). The area of Room VI also yielded a relatively large number of door-jambs (cf. fig. 14). These originally would have served in series of doors located on both sides of the stairway, giving access to lateral room spaces which probably were on different levels. But it is also possible that some of these door-jambs were reused in some later restoration of Wall 33.

Fig. 18: Huge Nabataean capital from Structure 2 (photo: S. G. Schmid)

As for the chronology of Structure 2, some preliminary results can equally be added. It was observed that, contrary to Structure 1 (cf. above), there are several zones inside and outside the building that show astonishingly homogeneous Nabataean pottery. This is all the most surprising since we are dealing with surface pottery, where one would generally expect a relatively high degree of heterogeneity. The areas under consideration show a clear focus within phases 2b and 2c of Nabataean fine ware pottery Phasing according to Schmid 2000. and would, therefore, date to the last quarter of the 1st century BC and the first quarter of the 1st century AD (fig. 19).

Fig. 19: Nabataean fine ware pottery belonging to phase 2b from Structure 2 (photo: S. G. Schmid)
Fig. 20: Selection of terra sigillata from the NEPP area (photo: S. G. Schmid)